⚠️ IMPORTANT NOTICE FOR U.S. CUSTOMERS: Due to the recent suspension of the de minimis exemption by the U.S. administration (under the Trump-era policy change), I’ve unfortunately had to drastically increase the shipping costs to include all the required customs fees ⚠️
  • Australia ( AUD$ )
  • Canada ( CAD$ )
  • New Zealand ( NZD$ )
  • United Kingdom ( GBP£ )
  • United States ( USD$ )
  • English
  • Français
  • Craft Embellishments
    • Buttons
    • Patches & Pins
    • Stickers
    • SVG and Printables
  • ➤ Jewelry making
  • ➤ Beads
  • ➤ Hypoallergenic Findings
Welcome Sign In/ Register
  • Australia ( AUD$ )
  • Canada ( CAD$ )
  • New Zealand ( NZD$ )
  • United Kingdom ( GBP£ )
  • United States ( USD$ )
  • English
  • Français
Bonjour Handmade
Search
0
  • Craft Embellishments
    • Buttons
    • Patches & Pins
    • Stickers
    • SVG and Printables
  • ➤ Jewelry making
  • ➤ Beads
  • ➤ Hypoallergenic Findings
Home DIY jewelry making ideas Jewelry tutorial: making natural cord bracelets with wooden beads and buttons
DIY jewelry making ideas

Jewelry tutorial: making natural cord bracelets with wooden beads and buttons

Jewelry tutorial: making natural cord bracelets with wooden beads and buttons
Here is a truly eco-friendly tutorial! These unique bracelets are made using hemp cord and wooden accessories. You can easily change or adapt colours and sizes to your taste.
 
You will need the following items:
  • Hemp cord or any other kind of natural cord
  • Wooden buttons and beads
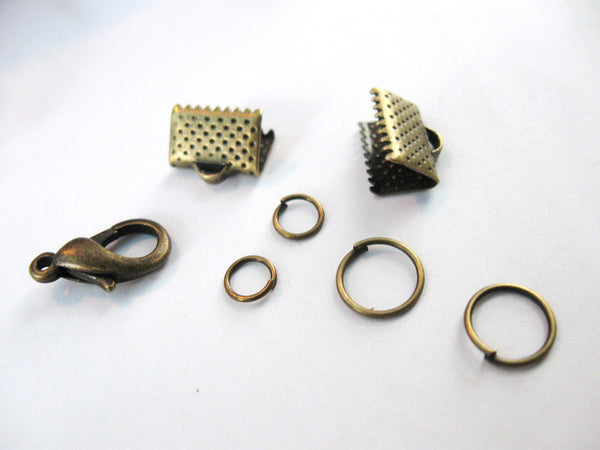
  • Clasps, jumprings and end fasteners 

      
    I started by winding hemp cord seven times around a guide. I used a ruler, for a finished length of 6 ½ inches (16.5 cm). This length is perfect for a 6 inch-wide wrist (15.5 cm). 
      
      
    Then, I cut the wound cords and secured one end of all the fourteen cords.  I sew the cord ends together with my sewing machine to hold them tightly together while working. 
      
      
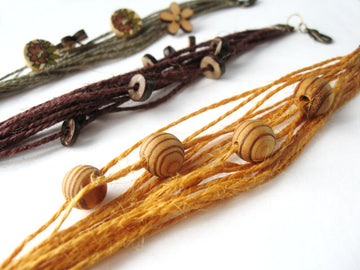
    I had to vapour press the cords slightly with an iron to straighten them and smooth out folds. Next, I slipped a selection of pearls and buttons onto them. For brown cord, I used coconut beads. 
      
      
    I did not make any knots. I wanted to let the pearls fall into place freely. Then, I sew the free end of the bracelet with my sewing machine  to finish assembly. 
      
      
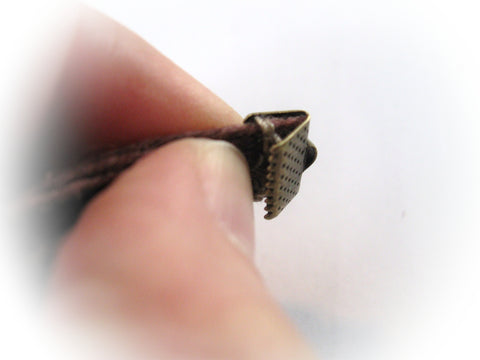
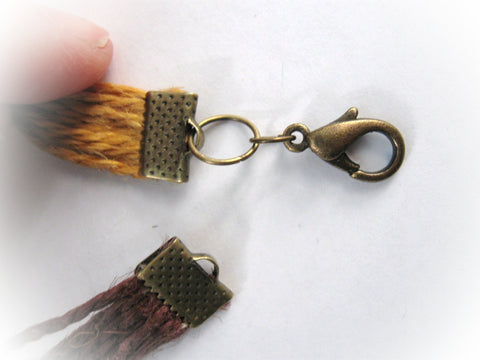
    It’s time to insert the end of all the cords into an end fastener.  Repeat at the other end. 
      
      
    Then affix two rings on one end of the bracelet: one small and one large. 
      
      
    Do the same thing on the other end, but by inverting the rings and adding one clasp. 
      
      
    And there you go! You now have a nice bracelet only waiting to be matched with other bracelets of different colours! 
      
      
    I hope you will enjoy making these bracelets!
     
    For the green bracelet, I used flower buttons and nice painted buttons. For the mustard yellow bracelet, I used brown striped 12mm wooden beads. And for the brown bracelet, I used 9mm coconut beads.
     
    Do not hesitate to send me pictures of your completed projects! 
      
    Sign up for my newsletter to make sure you never miss any of the next tutorials !
    Tags: Bracelet
    Previous
    DIY Tutorial: Making Paper or Cardboard Flowers
    Next
    Making Shipping Envelopes with Recycled Cardboard

    Related Articles

    How to Hang a Pendant on a Cord Necklace

    How to Hang a Pendant on a Cord Necklace

    Read more
    Easy DIY pastel rainbow and unicorn bracelet set

    Easy DIY pastel rainbow and unicorn bracelet set

    Read more
    DIY Christmas Earrings - Gift ideas on a budget

    DIY Christmas Earrings - Gift ideas on a budget

    Read more
    DIY Chic: Crafting Your Own Personalized Paper-Clip Bracelet Chain

    DIY Chic: Crafting Your Own Personalized Paper-Clip Bracelet Chain

    Read more

    Recent Post

    How to Hang a Pendant on a Cord Necklace
    Necklace
    How to Hang a Pendant on a Cord Necklace
    Easy DIY pastel rainbow and unicorn bracelet set
    Bracelet
    Easy DIY pastel rainbow and unicorn bracelet set
    DIY Christmas Earrings - Gift ideas on a budget
    Earrings
    DIY Christmas Earrings - Gift ideas on a budget
    DIY Chic: Crafting Your Own Personalized Paper-Clip Bracelet Chain
    Bracelet
    DIY Chic: Crafting Your Own Personalized Paper-Clip Bracelet Chain
    Splash into style: The personalized mermaid bracelet set
    Bracelet
    Splash into style: The personalized mermaid bracelet set

    Categories

    • Adorning
    • Bracelet
    • Earrings
    • Hair Accessories
    • Necklace
    • Packaging
    • Storage

    USPS shipping

    With tracking number.

    Quality guaranteed

    100% satisfied or refunded for 14 days.

    Happy customer

    With more than 12,000 positive reviews.

    ABOUT THE SHOP

    Bonjour Handmade is your source for hypoallergenic findings (nickel free and stainless steel), high quality jewelry making beads, and fun craft supplies.

    JEWELRY MAKING SUPPLIES

    • Beads
    • Charms and pendants
    • Hypoallergenic Findings
    • Jewelry making kits
    • Ideas and tutorials

    CRAFT SUPPLIES

    • Buttons
    • Papercraft
    • Packaging
    • Digitals

    CUSTOMER SERVICE

    • About
    • Shipping info
    • Wholesale - Buy in Bulk
    • Refund Policy
    • Privacy policy
    • Terms of Service
    • Contact
    © 2024 Bonjour Handmade. All rights reserved.
    • English
    • Français
    Payment options:
    • American Express
    • Apple Pay
    • Diners Club
    • Discover
    • Google Pay
    • Mastercard
    • PayPal
    • Shop Pay
    • Visa
    0
    This website uses cookies to ensure you get the best experience on our website. Learn more

    Shopping Cart

    Your cart is currently empty.
    Add note for seller
    Estimate shipping rates
    Add a discount code
    Subtotal $0.00 USD
    View Cart