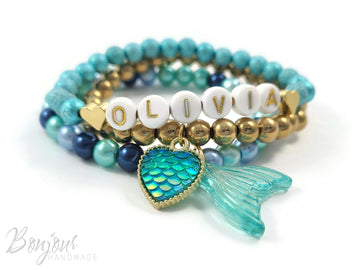
Are you looking for an activity for your child's next birthday party? If you have a creative child you may decide hosting a jewelry-making party is a great idea. It's a nice quieter activity and children can create their own jewelry while having a fantastic time. In addition, it is a way to create complicity between best friend.
We all know that little girls love to make jewelry but in my experience, boys do too! Just add more neutral colors and you're done! You could also add special charms that will appeal to your boy guests.
Hosting a jewelry making birthday party is a great alternative to hosting a physical party that can overexcite your guests. Jewelry-making needs concentration and patience to create, but each party guest will be proud of their creations! It's the perfect mess-free craft activity: guests will stay clean!
Jewelry-making parties can be tailored to different age groups and skill levels, making them a great option for a wide range of children. And the best part of these types of parties is that each child has a unique and personalized piece of jewelry to take home as a party favors.
As the party host, you will typically provide all the materials needed for the party activity and will need to give your party-goers enough choices to show off their personalities within their jewelry. But what supplies do you need and how do you organize the perfect jewelry-making party?
How to Host a Jewelry-Making Party
To help you get organized for your beading party we’ve put together some tips and tricks to make the event run smoothly from start to finish.
The type of jewelry you decide to make at the party will depend on the age of the children. Smaller children will benefit from using bigger beads and will need more support to finish their jewelry than older children.
Also consider the number of guests at your party, inviting too many guests will mean you need to buy more supplies adding extra cost to your party and you may need extra helpers.
Let’s think about what you need to prepare before, during, and after your party.
What equipment will you need?
For your children's jewelry-making birthday party, you will need the following supplies:
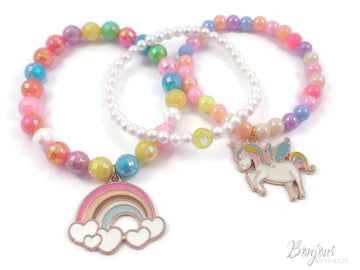
- Beautiful beads: A variety of colorful and fun beads in different shapes and sizes, including plastic, glass, or metal options. Using a bead organizer can help keep all the colors separate.
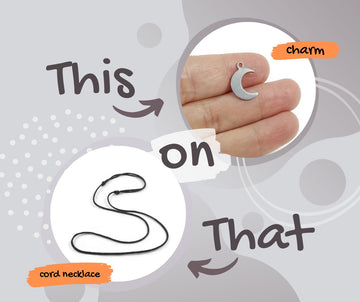
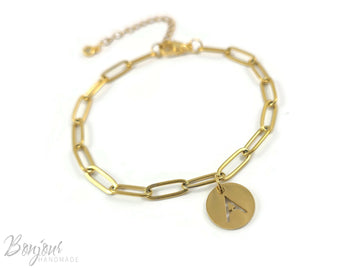
- Charms: Small decorative items, such as animals, letters, and shapes, that can be added to the jewelry for personalization. Maybe you can get themed charms to fit the birthday theme.
- String or Wire: To string the beads and charms together to create the jewelry.
- Pliers: To crimp the ends of the wire or string to secure the beads in place.
- Jewelry Clasps: To fasten the jewelry around the neck or wrist.
- Jewelry-Making Findings: Additional tools such as jump rings, crimp beads, and wire cutters may also be necessary, depending on the design of the jewelry being created.
- Table Coverings: To protect the surface of the work table and make clean-up easier.
- Organza bags- so that each child can store and take home their jewelry when finished. You can add a name tag so guests don't mix up their creations when they leave.
Does all this seem complicated to you? Get one of our ready-made bead kits to have everything you need without the hassle. Choose the perfect diy jewelry making party kits for the easiest party, right from the comfort of your own home. Take a look at our different project options HERE.
If you have the room it is also a good idea to have a designated area for the jewelry-making activity, with enough space for each child to have their own work area. Having extra supplies on hand is also a good idea, in case of any accidents or mistakes during the creation process.
Before your party
- Practice making the jewelry pieces you will make at the party. Practice all the different aspects such as crimping and finishing off bracelets and necklaces. Ask a friend to practice as well so they can help throughout the party.
- Find a display board that you can use during the party to show off your samples and give the children ideas on how they can design their jewelry.
- Make your bracelet and necklace wires ‘ready to go’ by pre-cutting them, making them 2-3 inches longer than you need. This means they aren’t waiting around for the next project to be set up or for an adult to finish off their first bracelet.
Setting up your party
- Make sure you have enough space at your table for everyone to work comfortably
- Use a bead organizer to keep your beads neat and easy to access.
- Have one adult in charge of the bead organizer and hand out beads to the children. They should also be in charge of pouring the beads back into the right containers when children change which color they’re using.
- Have a ‘findings tray’ to make finishing each piece of jewelry easier.
- Set out the charms on a bead mat to make it easy for children to select the charm they want for their project.
In front of each child place:
- a measuring chart
- a pre-cut bracelet wire, with a clasp at one end
- 3 bead cups (or bead boards)
- an organza bag with their name on

During the day of the party
Give clear instructions to children at the beginning of the party will let them know the expectations throughout the jewelry-making:
- Tell them what they will be making e.g. a charm bracelet
- Hold up a sample of what you want them to make and tell them after the first project they can choose to make another one or a necklace.
- Show them their bracelet wire and let them know that is where they will place the beads.
- Ask them to line up behind the Birthday Child, ready to choose their colored beads.
- Let them know they can change colors between projects if they wish.
- Tell them that the adults will help them measure their wrists and show them which line to follow on their measuring chart.
- Demonstrate how to use the measuring chart. Tell them to add the charm to the center of their bracelet design.
- Ask them to raise their hand when they have finished so an adult can help finish your jewelry piece.
At the end of your party
Once everyone has finished making their jewelry, usually 2 or 3 pieces each, it's time to tidy up. If the children are older enough they can help with this part of the party before food and cake are served. Otherwise have some party games ready such as musical statues to entertain everyone whilst you put away the jewelry supplies and put out the food.
It's a good idea to have another adult who can help anyone who may be slow finishing their jewelry so they don’t miss out on finishing their pieces.
How to keep your party safe
Jewelry-making parties for children can be a fun, exciting, and creative activity, there are some potential dangers to be aware of to ensure everyone stays safe and the party remains an enjoyable experience for all:
- Choking Hazards: Small beads and charms can pose a choking hazard for young children, so it is important to supervise them closely and keep small items out of reach when not in use.
- Sharp Tools: Pliers, wire cutters, and other jewelry-making tools can be sharp and dangerous, so it is important these tools are used by an adult and older children instructed on how to use them properly.
- Allergies: Some children may have allergies to certain materials, such as metal or certain types of glue, so make sure to ask parents about any allergies in advance and to have alternative materials available if necessary.
- Strangulation Hazards: Long necklaces or bracelets can pose a strangulation hazard, make sure your materials are a suitable length for each child and provide adult supervision during the activity.
By being aware of these potential dangers and taking the necessary precautions, you can ensure that your jewelry-making party is a safe and enjoyable experience for everyone.
I hope this article has given you all the tools you need to host jewelry-making birthday parties.
You can check out our blog for more craft party activities ideas, or browse our ready jewelry making party kits, including personalized bracelet kits.
