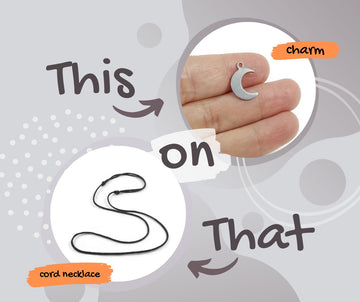
Transforming a simple necklace into a unique piece of jewellery doesn't have to be daunting. In this blog post, we'll explore two popular methods: using a jump ring and using a pinch bail.
- Jump Rings: These tiny circular connectors are a jewelry-making staple. They offer flexibility and ease, making them perfect for those who appreciate simplicity and elegance.
- Pinch Bails: For those looking to add a touch of sophistication or secure a heavier pendant, pinch bails are the way to go. These stylish findings hold your pendant securely and add a professional finish to your creation.
Each method has its unique charm and application, and by mastering both, you'll be well-equipped to elevate your jewellery-making skills. Let's dive into the details and discover how to give your necklace that perfect finishing touch.

Materials Needed:
- A pendant with a drilled hole at the top
- A jump ring or a pinch bail (a small metal finding with two prongs)
- A ready-made adjustable cord necklace (leather, cotton, or chain)
- A pair of jewelry pliers (flat-nose or chain-nose)
Steps to Attach a Pendant with a Jump Ring:
1. Open the Jump Ring (or use an opened jump ring). You will need two pliers or one pliers and this tool. TIPS: To open a jump ring correctly, twist it sideways using pliers, avoiding pulling it apart to maintain its shape and strength.
2. Insert the Jump Ring into the Pendant and thread the Necklace Cord.

3. Close the Jump Ring
Steps to Attach a Pendant with a Pinch Bail:
A pinch bail is a simple and elegant way to attach a pendant to a necklace without needing jump rings or complicated wire wrapping. Here’s a quick step-by-step guide on how to use one:
1. Open the Pinch Bail
- Gently use your fingers or pliers to separate the two prongs of the bail slightly.
- Be careful not to open it too much; it should be just enough to fit the pendant hole.
2. Thread the Necklace Cord
- Slide your cord necklace through the top loop of the pinch bail.

2. Insert the Prongs into the Pendant
- Align the prongs with the drilled hole of your pendant.
- Push them through carefully until the pendant sits securely between the two sides of the bail.

3. Close the Bail
- Use your fingers or pliers to press the bail’s two sides together until the prongs grip the pendant securely.
- Ensure the pendant hangs freely and isn’t too tight or loose.
Wear and Enjoy!

Your pendant is now securely attached and ready to wear.
Tips:
- If the bail doesn’t close tightly, gently squeeze it with pliers to secure the pendant.
- Choose a bail size and design that complements your pendant for a polished look.
- Pinch bails work best with top-drilled pendants like crystals, gemstones, or metal charms.
Now you have a beautifully attached pendant that’s easy to wear! 😊